How to make a sniper rifle. Part 7: Mounting a side rail on the Mosin Nagant
As described in the previous post, the best - and the priciest, and the hardest to
install - scope mount is the Dragunov side rail.
This post describes how to install it.
Preserving the original rifle
Most Mosin Nagant rifles made during WWII in Russia have no
historical value. Majority were rebuilt in Russian arsenals after the war from a
smorgasbord of non-matching parts, sealed in cosmoline, and put away. You can
safely treat these rifles as a LEGO set - it is OK to permanently modify
it.
And modified it will be - the stock will have to be dremeled to
create an opening for the side rail, and the bolt handle will be
replaced.
If, however, your rifle has matching numbers (especially if
bayonet number matches as well!), have been made before the war, and is in
excellent shape, you might want to buy extra parts instead of modifying the
originals. Preserving original stock and bolt body would allow you to restore
your rifle to its exact original shape easily.
Note: I think modifying a
pre-revolutionary Mosin Nagants in any way, shape, or form is an act of pure
barbarism. There are not so many of them left! If you are a lucky owner of a
pre-1917 rifle, and want one with the scope, please let me know and I will be
happy to trade a finished one - with the rail installed, and bolt bent - for it.
Or two unfinished ones :-).
If you want to preserve the original parts,
you will need to procure the parts you will modify - the stock and the bolt body
- separately. The stock is easy to buy, for example, http://www.buymilsurp.com/ has a whole lot
of them in various conditions. Since you can reuse the metallic part, you will
have to refinish the stock (see below), and you do not need the handguard (it
only makes the rifle less accurate), you can buy a cheaper part. For example, as
of this writing, there were plenty of very acceptable variants in the $25
range.
On the other hand, procuring the bolt body is very, very hard. You
only need the bolt body, not the entire bolt. In fact, because you probably do
not have a headspace gauge, you will need to reuse the rest of the components of
the original bolt because it matches the rifle (to learn more about headspace,
and what can go wrong if you don't pay attention to it, read this: http://www.surplusrifle.com/shooting/headspace/index.asp).
Bolt body is the part to which the handle is attached.
There currently is not a good place
where bolts or bolt bodies can be purchased. The cheapest, but an unreliable
source is your local gun show - there typically would be a few available for
$10-$12. Unless you are in Seattle area, because I bought up every one that was
available locally :-).
An unknown type of the already bent bolt body is
sold here: http://www.tngunparts.com/m9130.htm.
See below (in the Bolt Body section) for precaution - the bolt handle
needs to be replaced, not just bent.
Failing that, look for ads for
surplus rifle parts in Shotgun News, there usually is a place or two where you
can get complete bolts for $25-$40 a piece. I bought quite a few
there.
Check http://www.ebay.com/ or
http://www.auctionarms.com/, the parts
occasionally show up there.
Boltman (http://www.mosinnagant.net/Boltman/Boltman.html)
sometimes has them in stock, but more often he does not. If he does, the price
quoted on the page above ($55 for the whole thing) is very, very
attractive.
Failing all that, you can buy a rifle in a very poor shape
and cannibalize it. If you have a C&R license, you can often find them on
the Internet for less than $40.
Failing everything else, the bolt bodies
can be purchased for $34 from Numrich store at http://www.gunpartscorp.com/catalog/Products.aspx?catid=3258.
Yes, this is ridiculous considering that the price of a gun was
~$100.
Remember the headspace, however - do not move the entire bolt from
rifle to rifle!
Project inventory
You will need the following things for the project.
(1) The rail from http://www.kalinkaoptics.com/. $25 plus
a ridiculous shipping price. Tough luck: this is the only place where this
particular component can be found. On their web site, Browse Category ->
Firearm Accessories -> Side Rails (http://www.kalinkaoptics.com/firearm-accessories/side-rails.html).
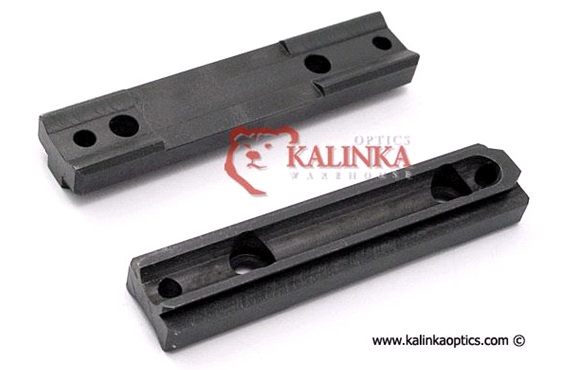
Be careful not to buy the undrilled
side rail for $15 - it is too thin and will not stick enough to protrude
above the stock surface.
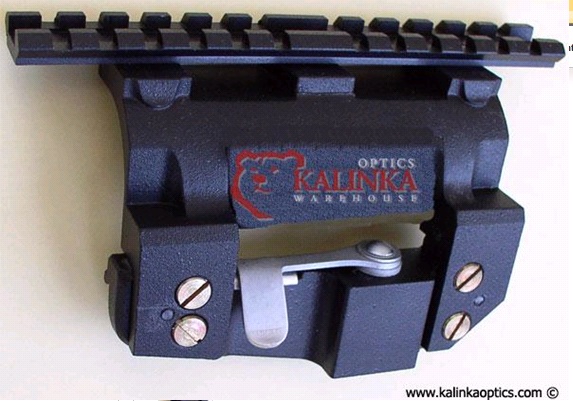
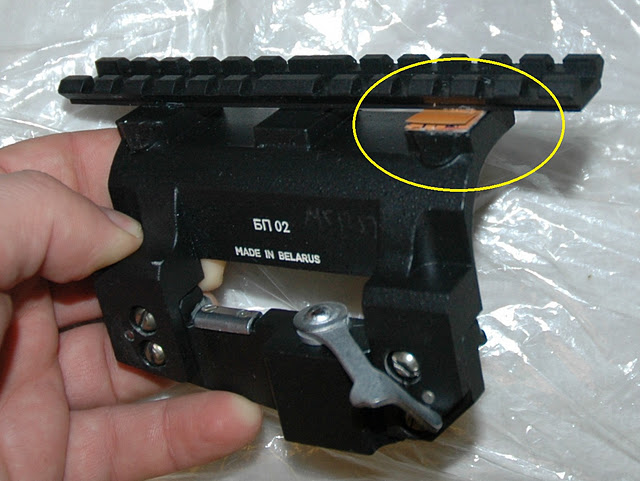
(2) "Original BP-02 SVD, PSL, Tigr Low Profile
Centered Side Mount to Weaver Rail" from http://www.kalinkaoptics.com/, $53
(plus the above "arm and leg" for shipping. Combine with (1) and it will be
slightly less offensive). "Low profile" part is very important. This can be
found in Browse Category -> Mounts -> SVD, Tigr, Romak-3 (http://www.kalinkaoptics.com/mounts/svd-psl-tigr-romak-3.html).
(3) Stock that you will feel OK
modifying (see "Preserving the original rifle" above).
(4) Bolt body that
you will feel OK modifying (see "Preserving the original rifle"
above).
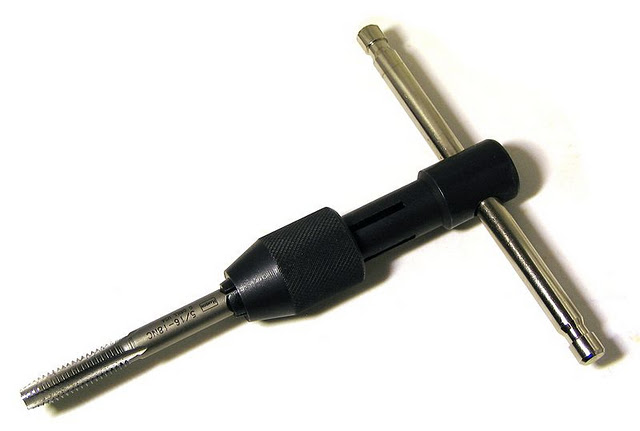
(5) Drill bit #11, drill bit #21, 10-32 tap, T-wrench to hold the
tap, and 2 10-32 x 1/2" screws. This is available in the local hardware store
(for example, ACE). Get the ones that are the best quality, designed for
hardened steel.
(6) Cutting oil.
This is a bit hard to find, but I tracked it down in Lowe's and in ACE. Home
Depot does not have it.
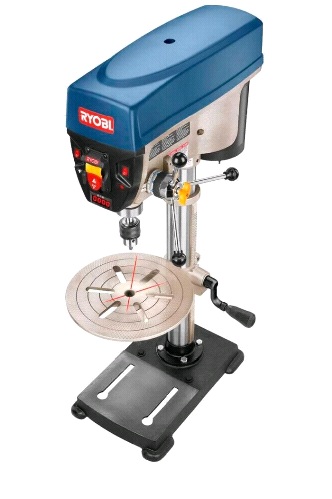
(7) Drill press. Local hardware store,
$120-$180.
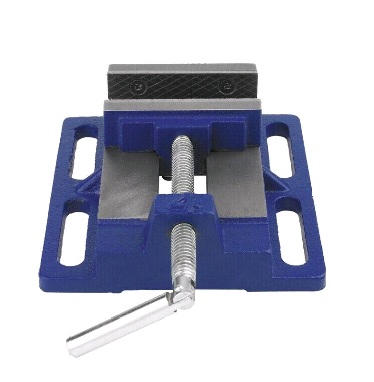
(8) Drill press vise. Home Depot,
$16. A few large matching bolts, nuts, and washers to fix it to the
drill press table, same source.
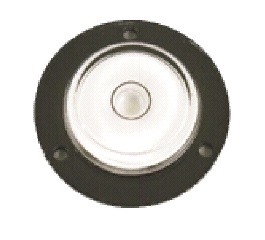
(9) Small bulls eye level. Home Depot.
(10) Paint stripper, for example, Citristrip (http://citristrip.com/). Sand paper (coarse
and fine), steel wool (fine). Two brushes. Gloves, paper towels, 2 wood blocks,
old newspapers. Local hardware store.
(11) Wood stain of your choice. You
should defer picking the color until you have stripped the stock of its current
paint.
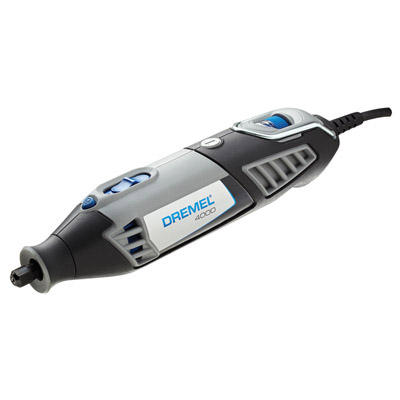
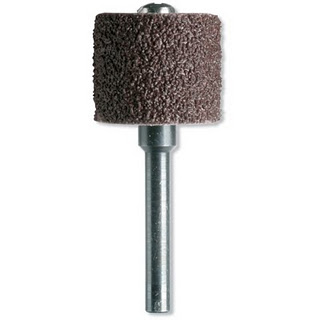
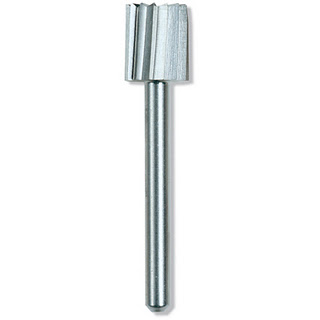
(12) A rotary tool like Dremel.
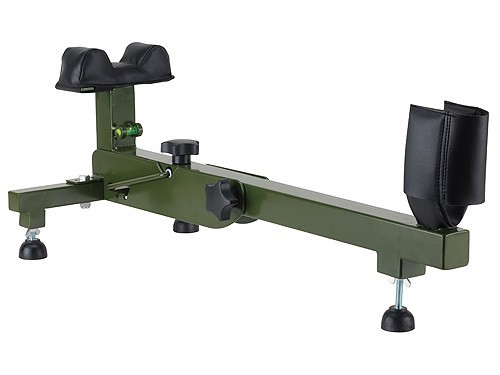
(13) A gun vise or an inexpensive shooting rest. http://www.midwayusa.com/, $20-$60,
depending on whether you want to have something you can use for shooting, or
just mounting the gun for cleaning and scope alignment.
(14) A laser boresighter. http://www.midwayusa.com/. There is no
picture here because I really cannot recommend any particular model - the choice
is between an expensive and crappy one ($150 LaserLyte Kryptonyte Green Laser
Boresighter 22 to 75 Caliber), and a less expensive but equally crappy one ($30
Sightmark Laser Bore Sight 243, 308 Winchester, 260, 7mm-08 Remington).
Price/performance of the Sightmark is better. The above-referenced caliber (243)
works for 7.62x54r, although the bolt does not close. This is OK, the bolt does
not close in 308 rifles either.
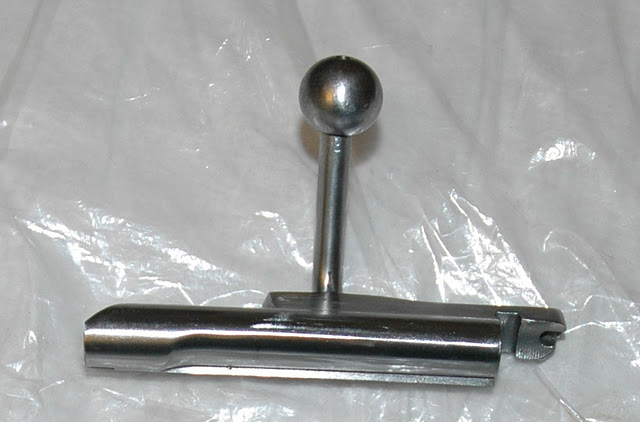
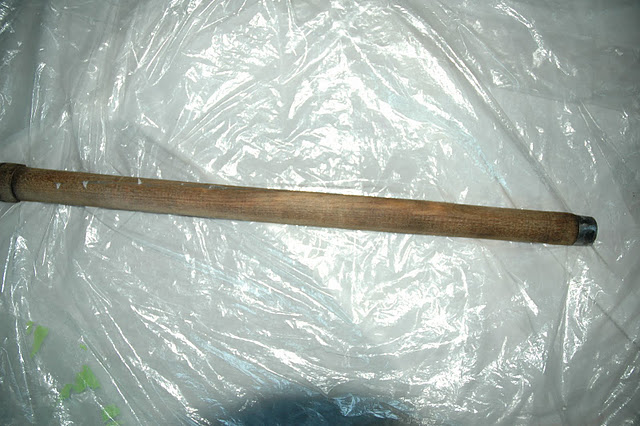
Bolt body
To work with
any scope mount other than the scout mount, the bolt handle needs to be turned
down. This is because when the bolt is open, it's handle sticks upwards and
interferes with the scope. There are several ways this can be accomplished.
First, there is an ATI bolt handle kit that costs around $20 on eBay and
contains the replacement handle, the drill bit, the tap, and the screw. The
result does not look amazing, and requires notching the stock because the handle
extends directly down when the bolt is closed.
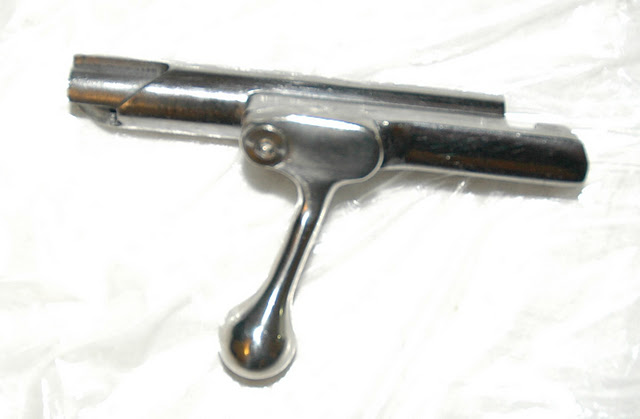
The picture below looks nicer than the reality.
As of this writing, a bolt body with
the handle turned down can be bought from here: http://www.tngunparts.com/m9130.htm for
$54. I have not used them, so I do not know how exactly is the bent handle
manufactured,. Sometimes they simply bend the handle down without adding to the
length of it. The result is not that good, there simply is not enough
handle to grab it when opening and closing the action:
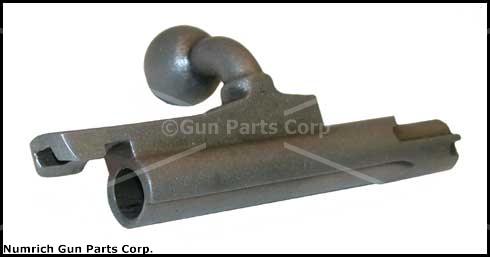
(the part above is available
here, http://www.gunpartscorp.com/catalog/Detail.aspx?pid=291700&catid=3258 for
$34)
eBay has a number of people sell bolt bending as a service:
you mail them your body, they modify the handle for you, and mail it back. I
used Marvin Burrows (eBay: mellbee) several times, and he does excellent job for
around $46, including shipping. This is his eBay ad:
And this is the result:
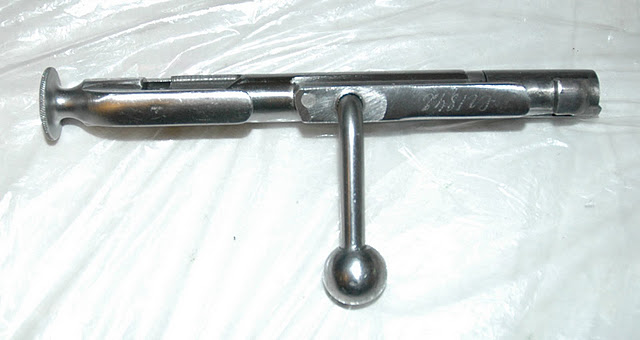
The turnaround time is about
2 weeks including the mailing time.
If you are really
adventurous, you can try doing it yourself using the instructions here: http://www.gswagner.com/mosin-nagant/bolt/mnbolt.html
...or here:
http://www.opticstalk.com/topic12364.html.
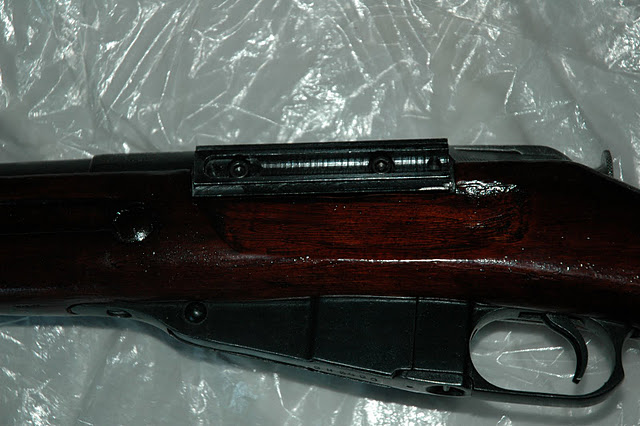
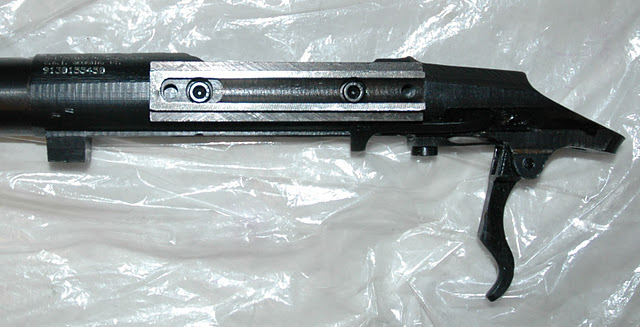
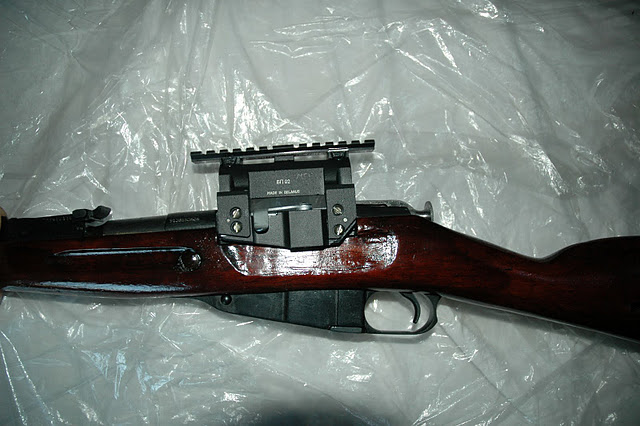
Side Rail
This is the "mechanical" part of the
project. You will need to drill and tap 2 holes in the receiver to attach the
side rail.
To do this, you need to attach the side rail to the
receiver temporarily to drill the very first hole. It goes on the left part of
the receiver so that its top is close to flush with the opening in the action.
This time I suggest you remove the
trigger group by unscrewing the single screw that holds it on the receiver.
Mounting the receiver in the vise is hard as it is, without extra parts sticking
out.
Before you mount the receiver, ensure that the drill table
is horizontal by using a level. You will need this to align the receiver surface
to be perfectly horizontal afterwards.
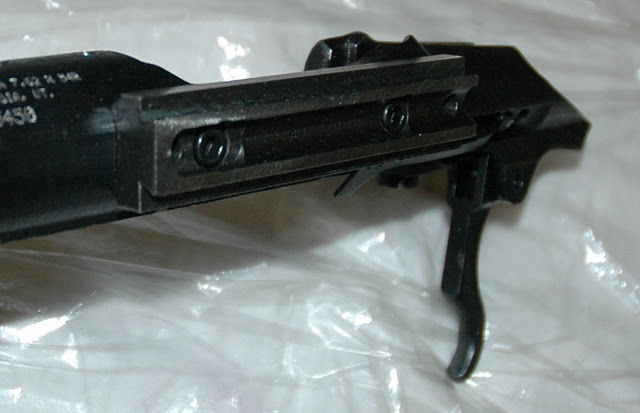
Place the rail in the side
of the receiver. I do not know if there is "the" right spot. The receiver is
curved, and on all 3 rifles on which I put the side rail the scope ended up
pointing up and to the left relative to the barrel axis. This is OK: the problem
will be corrected by shimming the mounting bracket. See the couple of pictures
above for approximately right location.
The legs on the rail
should obviously hug the receiver and not hang out through the action's opening.
Fix the side rail in place. You can use either a very small clamp, or
wrap it tightly using electrical or duct tape. Make sure that neither cover the
opening which you will drill.
Plug the chamber with a tight wad of
paper towel to ensure that the metallic debris from drilling does not end up in
the chamber or the barrel.
Place the drill table vise on the
drill table. Do not yet attach it with the bolts. Place the receiver on the
vise, tighten the vise as little as necessary so that the receiver does not
slide. Guide the system so that the hole in the side rail is approximately below
the drill's chuck, and at the same time all four of the mounting openings in the
vise intersect with the mounting openings on the drill table.
Adjust the drill table to a height where the drill bit can be lowered
sufficiently to drill through the receiver.
Put the bolts through the
mounting holes. Use the washers on both sides, and screw them down so that the
whole system can move about with some friction. Now place the bulls eye level on
the side rail, reopen the vise jaws just a little bit so that receiver can be
reoriented, and move it slightly so that the bubble of air in the level is right
in the center. Reclose the vise jaws and tighten them, while monitoring the
bubble - when jaws are closed the receiver might shift and the leveling action
will have to be repeated.
Now that the system is aligned
horizontally, put the larger drill bit in the chuck. Tighten. Do not turn the
drill on yet, but lower the chuck to see where it would touch the metal. By
moving the vise slightly ensure that the drill bit goes exactly through the hole
in the side rail. The larger drill bit should fit tightly through that hole.
When it's in, rotate it around to make sure that the system is perfectly aligned
and the drill bit does not scrape the metal of the side rail.
Tighten the bolts that fix the vise on the drill table. Lower the chuck
again to make sure the position did not shift. Rotate it around again.
Put the eye protection on, turn on the drill and lower the larger
bit just enough to make a small crater, just the diameter of the drill but not
deeper than necessary, on the steel of the receiver. Raise the chuck and replace
the drill bit with the smaller one. Lower the chuck to ensure that the system is
still aligned. The drill bit should touch the metal right in the middle of the
crater left by the bigger drill.
If the drill has an adjustable RPM, set
it to medium low (800-1200). Place a drop of the cutting oil on the receiver
where it will be drilled. Note that cutting oils are toxic, do not let it
anywhere near your exposed skin. Use gloves!
Drill slowly, raising the
chuck to clear the metal debris out of the hole often. Do not apply a force that
is more than 20lb (100N). This is very important, or the drill bit can break and
stick in the hole, and it might be impossible to remove it! When the hole is
drilled though, remove the receiver from the vise, and remove the side rail
from the receiver. Using paper towel (and gloves!) clean all metal debris from
the receiver.
Put another drop of cutting oil (gloves!) on the tap.
Rotate it and guide it in the hole, maintaining perpendicular angle to the
receiver. Go lightly, reversing the direction, cleaning the debris and reoiling
frequently. A broken tap is a disaster - it is made of a hard alloy and if
broken is next to impossible to remove.
When the thread is cut
(the widest part of the tap is through the hole), remove the tap, clean the
receiver and the new thread using paper towels. You can now screw the side rail
to the receiver using the newly made hole and one of the screws, and repeat the
process for the next hole.
Useful hint: when tapping the second
hole, keep the side rail in place (but clean the drilling debris out!), it will
help guide the tap.
Stock
This is the last part of the
project. Now that we have a rail on the side of the receiver, the stock will not
fit and a cut out needs to be made to accommodate the part that is sticking out.
Also, the height of the side rail is somewhat smaller than the thickness of the
stock, so a small layer of wood needs to be removed from the left side of the
stock so that the rail is exposed enough.
Because quite a bit of finish
will be removed to accommodate the rail, we will need to refinish the stock. If
you have done this before, just go with what you know, not what I write here. I
am a complete novice to wood finishing, and the results I personally achieved
are functional, but not beautiful.
First, use the paint remover to get
the current finish off. You will need a brush, a paint stripper, steel wool and
sand paper for this.
Citristrip is a paint stripper that can be used
indoors, other must be used outside. Make sure that the weather is right! Vast
majority of them are health hazard so be cautious and read the instructions
before starting. I found that a combination of Citristrip followed by the
classic stain remover works well.
Although most of the paint/wax/whatever
it is will come off, some coloring will still remain.
You can probably get closer to
clean wood by sanding it off with sandpaper.
After you got as much
previous stain off as you think is practical, pick the stain that will (1)
survive outdoors, and (2) will either match the previous
stain closely or be dark enough to cover the remaining traces of the
older stain. I chose the later route, so that's what you see in the
pictures.
Place the barrel in the receiver and mark the places where the
stock interferes with the side rail. Using the rotary tool and the sanding
band...
...remove the side of the stock about 1/2 of the width
of the rail. Use the cutting attachment...
...to take care of the corners. Replace the receiver to
see how much the opening needs to be deepened. Keep doing this until the screwed
down receiver can go into the stock all the way and the side rail still does not
touch the stock.
Now take the scope or the mounting bracket and try to
slide it onto the rail. You will see that the side of the stock prevents it from
engaging. Again, using the rotary tool keep removing thin layers of the side
until the scope mount can slide onto the rail.
Take a look at the picture
below and note the depression cut out on the stock to accommodate the
externalities of the scope mount.
After the barreled receiver fits
(do not forget to screw it in and tighten the screws before ensuring that the
rail does not touch the stock), and the scope mounting bracket fits on the rail,
you are ready to apply the stain to the stock.
Disassemble the rifle back. Using the instructions for your stain and working in an open space (the
fumes are toxic!), apply a coat of stain, let it dry, then repeat twice,
applying the total of 3 layers.
After the stain dries completely (this will take a day), reassemble the rifle fully.
Adjusting the scope mount
As I said above, the side rail will not be precisely aligned with the barrel axis. In all
my mounts "out of the box" the scope will point high and to the left. This
misalignment may or may not be correctable by the scope's internal adjustment
mechanism, but it is much better to instead adjust the scope mount so that the
scope's natural axis is in alignment with the barrel.
There are a few reasons for aligning the mount instead of adjusting the scope.
First, the mount is probably pointing high. Even if you can adjust the elevation on the
scope, your scope will be close to out of the adjustment range pointing down. So
when you would want to move it down for shooting at 200/300 meters, it is very
likely that you will not be able to do it because scope's adjustment range will
already have been used to compensate for the rail.
Second, scopes near the edge of their adjustment ranges tend to not keep zero as well as they do
when they are centered.
Adjusting the Dragunov-type mount is actually
very easy. The bracket's top rail is attached to the middle part by two screws,
and the middle part attaches to the part that goes on the side rail with 4
screws. The windage (horizontal) adjustment is achieved by putting shims between
the middle and the bottom part, and the vertical adjustment is achieved by
shimming the rail.
I use aluminum strips from soda cans for shims - they
can be stacked to achieve exactly the necessary thickness.
Attach the scope to the mount.
Ensure that the scope's optical axis is centered. To do this, loosen the scope
in the rings and rotate it while observing the cross hairs through the eyepiece.
If the scope axis is centered, the impact point will be the same while the scope
rotates. Use windage and elevation adjustments to center the scope. When the
scope is centered, tighten the rings.
Turn the laser boresighter on
and put it into the chamber. Put the gun in a vise and point it to the wall some
distance away (10 meters or more, depending on the minimum distance at which
your scope still focuses). Note where the scope's cross hairs are, relative to
the laser beam.
Turn the boresighter off. You will need to make
several measurements, and the batteries are only good for minutes (despite what
the instructions claim).
Disassemble the scope mount, and measure
the sizes of the holes and distances between them.
Cut off several rectangular pieces of aluminum foil from the side of a soda can.
Initially make them much larger than is really needed. For the top shims you
will need to drill one big and one very small hole next to each other. For the
bottom shim, you will need two holes of the same size. The drill press will help
here.
It is easier to drill the holes when multiple layers of the
aluminum are bunched together. After the holes are done (plan to waste a few
pieces to practice) you can cut around them to size.
Add a few shim
pieces, reassemble the mount and replace the scope. Turn the laser boresighter
on and observe the new impact point.
The goal is to have the cross hairs
about 1"-1.5" ABOVE the laser mark at 10 meters. The actual scope axis is about
2" above the barrel axis, but you want to make the centered scope point a little
bit DOWN so that it does not run out of DOWNWARD alignment when shooting at
distances beyond 100 meters (to track the bullet trajectory the scope gets
turned down as the target is farther away).
You will have to do a few
passes to get the scope almost right. It does not have to be completely on
target - the last final touches are worked out using the scope's internal
adjustment mechanisms. Do not spend too much time on it until you get to the
range though - the accuracy of the laser boresighter is only within 10" at a 100
meters, if even that. It will get you on paper and you will use the scope's
controls to get on target from there.
Contents
- Introduction
- Buying
- Cleaning
- Disassembly
- Accurizing
- Selecting a scope mount
- Mounting a side rail
- At the range